 Most Americans are in the habit of recycling glass, plastic, aluminum, metal, and cardboard. But what about the rest of the waste we produce?
Each year, thousands of tons of kitchen scraps, lawn clippings, and waste from gardens end up in landfills. Organic materials make up over 60% of the materials entering the trash stream. These items are biodegradable, yet many people simply throw plant waste in plastic trash bags. Then they are transported to the landfill where they will never have the opportunity to be recycled back into nature.
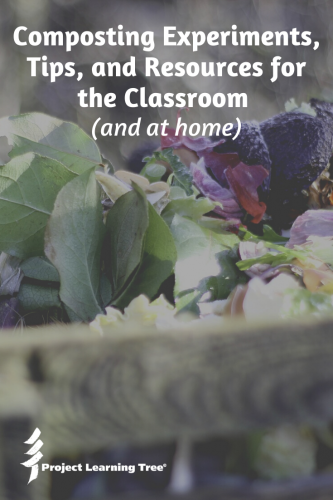
Instead of throwing valuable nutrients into landfills, plant scraps can be composted for an easy and cheap way to make fertilizer. Composting is a natural process that turns organic materials into soil. Not only does it reduce the amount of solid waste, but it also puts valuable nutrients back into the soil.
Compost forms when decomposers such as bacteria, fungi, insects, and animals break down dead organic material and release the nutrients back into the soil. It improves the quality of soil and helps soil hold air, nutrients, and moisture. In addition, compost prevents erosion and loosens hard soil, allowing plants to easily spread their roots and hold the soil in place. This also increases the soil’s ability to hold water and decreases runoff of muddy rainwater into local waterways.
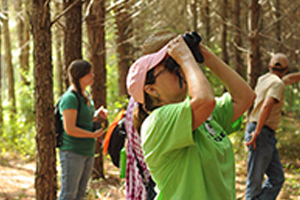
Composting can take place in your classroom, kitchen, backyard, neighborhood, or community. Learning about compost can be a hands-on activity, and you don’t need much space to get started. You can observe food scraps and other organic material breaking down into compost in a small container like a soda bottle. If you have room outside, you can use a bigger space to compost more material, or even try vermicomposting.
Mini Composters
Soda bottle mini composters are great for the classroom or inside your home. They are small and inexpensive to make, allowing each child to have their own composting system. At school, students can hold onto their compostable scraps from lunchtime, or bring some from home.
Typically, mini composters are made from clear soda bottles. This allows the students to observe the process of decomposition. The mini composters will not produce much compost, but it is a great example of what happens in a compost pile. If your school has a garden or you have one in your own backyard at home, students can empty their compost into the garden at the end of the year.
Putting together a mini composter can be done in a single day, however the decomposition process takes several months. Do not start this project at the end of the school year. Mini composters will not produce compost that is as fine as large-scale composting bins, but after a few months it should be impossible to identify the materials that were originally put in the composter and the volume should be reduced by half.
The added benefit of mini composters is that they can be used for experiments:
- Experiment with using the compost to grow seeds. This could be compared to using regular potting soil or topsoil for growing seeds. Set up a data table to collect measurements and compare growth to determine which soil is best for plant growth.
- Compare the differences in compost from various vegetable scraps or bulking materials.
- Compare the rate of decomposition to the size of the food scraps that are added to the composter.
- Before sealing up the mini composter, give students a thermometer to place inside the composting material. Have them position the composter so that they can take temperature readings while their compost is forming.
- Other skills that can be incorporated include observation, note-taking and writing, math (charting temperatures and volume), and research on how compost can be used.
Mini Composter Instructions:
Other Resources:
- Urban Gardeners Republic “Composting for Kids Guide” includes activities and video links to get kids excited about composting.
- The Environmental Protection Agency’s “The Quest for Less” teachers’ packet includes activities and resources for K-8 classrooms on reducing, reusing, and recycling. There are several pages of activities focusing on composting.
- TeachEngineering.org has a “Dirty Decomposers” unit lesson plan to design and conduct experiments to determine what environmental factors favor decomposition by soil microbes.
Vermicomposting
Kids love worms! You can add worms to your composting project and expand the number of topics included with your unit by adding decomposition, life cycles, invertebrate biology, animal behavior, and conservation.
Worm composting (AKA vermicomposting) uses a specific type of worm called a red wiggler (Eisenia fetida). Setting up a worm bin is easy, but it does require a few more details than regular composting bins. Extra care needs to be taken to create a hospitable environment for the worms, otherwise they may look elsewhere and escape into the classroom or home.
Fall is a great time to being worm composting projects. It will take about six months to “harvest” the first compost. Involve the students in all the parts of the process, from gathering food scraps instead of throwing them in the trash, observing the worms and harvesting the compost. Discuss the changes that are taking place as the worms transform the garbage into useful compost.
In addition to the experiment ideas listed for the mini composter, here are some experiment ideas specifically for vermicomposting:
- Identify the stages in the life cycle of a worm
- Conduct an experiment to investigate the red worm’s food preferences by offering different choices of food and observing which one(s) are preferred.
- Track the worms’ population growth by counting the worms at different intervals throughout the year and tracking their growing population.
- Gather information about the worms such as height and weight.
- Conduct an experiment to find out how long it takes them to eat specific types of food.
Vermicompost Instructions:
- Setting up a Worm Bin from StopWaste.org
- How to Start a Worm Bin: Vermicomposting 101
- Worm Composting Basics from Cornell Composting: Composting in Schools
Backyard Composting
If you have access to an outdoor area and space is not an issue, consider backyard composting.
There are two types of backyard composting: hot and cold. Hot composting is an accelerated method of composting that creates compost in just a few months. Hot composting requires some special equipment, the right mix of materials, extra time and extra effort.
Cold composting is an easier, less intensive method, but requires more time to produce usable compost. Cold composting does not require any special equipment.
Some people choose to use a bin to contain the compost, but composting can be as easy as making a compost pile in the corner of your backyard.
Fall is the best time to start outdoor composting. In the fall, both nitrogen and carbon materials are available. Choose an area with partial sun or shade. Too much sunshine can dry out the compost pile. Too much shade can make it overly wet.
Resources for Backyard Composting:
- “Composting at Home” from the Environmental Protection Agency
- “Composting How To: Tips on Starting a Compost Pile at Home” from Gardening Know How
- The Spruce “How to Make a Compost Bin Using a Plastic Storage Container”
- The Spruce “Hot Composting How-to Guide”
- The Spruce “How to Make A Compost Bin from a Trash Can”
- Cornell Waste Management Institute’s “Designs for Composting Systems” has instructions for building 12 different types of composting bins.
Classroom Resources for Composting:
- Cornell University has an excellent resource for high school teachers to incorporate composting into their curriculum: “Composting in the Classroom: Scientific Inquiry for High School Students”
- “Do the Rot Thing: A Teacher’s Guide to Compost Activities” from Central Vermont Solid Waste Management includes introductory, basic composting, worm composting and extension activities for K-12.