 Kids love watching something they have planted grow. And of course, there are a lot of learning opportunities as well. It can help teach students about a plant’s life cycle and there are many experiments that can be done with plants in the classroom. Plus, growing produce can provide an opportunity to learn about crop production and food security.
You don’t need a full-fledged garden to reap the educational benefits of growing your own plants. Planters are compact, require minimal equipment, can be made from household items and have a high success rate. Not to mention, students can decorate their planters and put their own personalities into their designs!
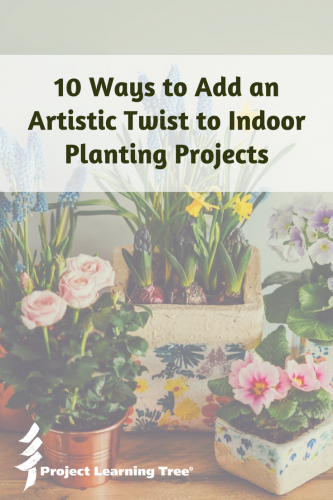
Here are some fun planter/pot activities for kids that encourage artistic creativity, and many use recycled materials from around the home.
1. Crazy Portrait Planters
This activity brings a bit of photography into the design. The first step is to adhere a photo on a pot (this is done with clear Con-Tact paper – here are more details). Step two involves growing something lush, wild or bushy in the pot. The result? The person in the photo looks like they have a crazy new hairdo.
Students will need to take photos and have them developed for this one. This can be a lot of fun, especially if the photos are humorous in nature. It would also be an opportunity to explore a child’s interest in photography.
2. Simple Decorated Pots
You don’t need a lot of fancy materials to create a unique design on your planter. Students can draw, color, or paint on white paper cups or small terracotta pots. Finger painting is another option.
You can choose to give students free reign to can draw or paint what they wish on their planters, or pick a theme to give them a starting point for their designs. They can also choose what types of flowers they would like to plant.
3. Homemade Paper That Sprouts
In this activity, students mash up paper scraps, mix in seeds, and produce uniquely shaped and colored paper that can be planted. You’ll need a blender, a packet of seeds, a cookie cutter, paper scraps and a mold (a mold is a piece of mesh or screen is pulled tight over a wooden frame). Once the paper is produced, find a spot to plant it, and watch the sprouts pop up! Check out this page for more detailed instructions.
NOTE: Children will need some supervision with this one, especially when using the blender.
Mix it up with different colors of paper. Mold the mixture in paper cups, muffin tins, or using other small objects. You can also flatten the mixture and use cookie cutters to make any shape you’d like — hearts, stars, animals; any cookie cutter you can get your hands on will work. And of course, you can pick what seeds to incorporate too.
4. Mini Sponge Grass House
In this activity, you essentially build a house using regular kitchen sponges, but with a twist. Add some grass seeds to the sponges and after some time you have something completely unique — a lush, colorful grass house! For this activity, you’ll need sponges, markers, rulers, storage containers, scissors, a craft knife (supervision needed when using this), and fast-growing grass seed. The complexity of house you build is up to you. Here is a link to a step by step guide and an example of the type of house you could build.
This activity is very hands-on. Your students will be able to build a house that they design themselves, adding unique features as they go. The houses could be one story, two stories, have multiple doors and windows, be of any color… sky’s the limit!
5. Decorating Pots with Natural Materials
You can decorate the outside of a pot with many different kinds of materials. For example, you could use colorful bottle caps, craft sticks, or string. However, if you use natural materials, such as bark, twigs or shells, it is a great way to get your students out of their normal learning space and into nature. Your students will need to find unique pieces of natural materials and adhere them to the pots with a hot glue gun. There are many different materials you can use for the pot — a plastic cup, a tin can, or a store-bought ceramic container.
NOTE: Students will need a bit of supervision with this one, especially when using the hot glue gun. You will also need to take care if you take your students near water to collect shells. If you choose to use a tin can for your pot, you will need to punch holes in the bottom side with a hammer and a nail. So, some parent/teacher help is advised.
Of course, students pick for themselves what objects they will decorate their pots with. And with shells and bark, there is a variety of colors, textures, and patterns to choose from. Older students may like to use the objects to construct an image on the side of the pot.
6. Grass Handprints
Kids love pressing their hands into plaster, clay, wet sand, or anything else that preserves their handprint. And if it can be kept as a memento, even better! This activity is a twist on that theme. Students will grow a grass handprint in a planter. You will need a container to plant in, potting soil, grass seed, a pencil or marker, scissors, card stock paper, and water. Here are detailed instructions.
7. Toy Planters
Do you have any toys lying around that could be turned into a planter? Old trucks, blocks, and other toys could be used as a unique planter. They can be great for planting succulents since they don’t require a lot of soil. For this activity, you only need the toy you plan to use, soil and seed.
If you can use blocks to build a planter, then students can build it in any shape or color they wish. It will truly be something they design and make themselves. This activity encourages children to think outside the box as they search for old toys and think about what could be used.
8. Grass Heads
In this activity, you’ll be using an old stocking/pair of tights as the planter. A layer of grass seeds is topped with a layer of soil to fill up the stocking. With the grass seed end facing up, eyes, lips, and noses are added to the outside of the stocking. Once complete, the “bald” stocking head is placed on top of a container that can catch excess water when the stockings are watered. After some time, the grass seeds will sprout, giving the head some seriously crazy hair.
In this activity, kids will inevitably get their hands dirty, which is always fun! Of course, kids will be able to decorate their stocking heads any way they see fit, using numerous different materials for the facial features.
9. Upcycled Plastic Bottle Planters
Making planters out of plastic bottles is a great way to re-use them. Of course, there are lots of different ways this can be done, but this method for making planters walks you through the process step-by-step. Essentially, you cut off the bottom half of a bottle to make the pot, leaving triangular tabs or other shapes to make ears. The protrusions at the bottom part of bottle look like legs. You just need to paint an animal, creature, or character onto to bottle. The re-use of plastic bottles is also a good talking point and could lead to lessons on recycling and conservation.
10. Garden in a Glove
A clear disposable glove is an excellent alternative planter “box.” You can see right through the glove and watch a seed germinate and grow. In addition to the glove, you’ll need a permanent marker, five types of seeds, cotton balls, water, and pipe cleaners. You can find more detailed instructions here.
There’s not a lot of design elements to this one. But it is very hands-on and is unique in its use of a glove as the planter. Kids will be able to check the planters daily and watch as the seeds grow, so it can also be an excellent teaching tool.