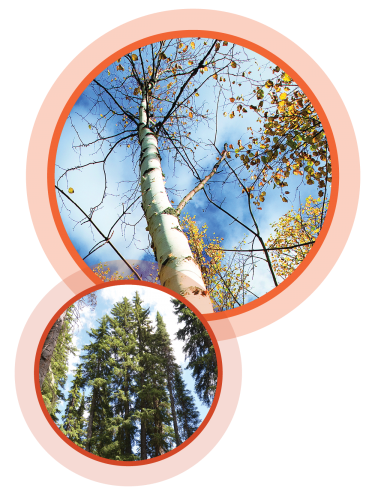
Key Concepts: Forests are comprised of trees that may differ in species, age and size, and which are affected by biotic factors (e.g., plants, animals and humans) and abiotic factors (e.g., soils, nutrients, moisture, sunlight and climate). [PLT’s Forest Literacy Framework, Concept 1.A.2]
Objectives: Provide opportunities and materials for learners to:
- Develop an understanding of tree measurements.
- Measure trees in a systematic, consistent way
Session Time: 50 minutes
Setting: Outdoors
Foresters measure trees as part of a forest inventory to help them make forest management decisions. To determine the approximate timber yield of a stand of trees, they perform a “timber cruise” in which they calculate the volume of timber in a given area, examine the health of the forest, and survey the species found there.
Foresters use a tree’s height and width to estimate its timber volume. To determine height, they measure the distance from the observer to the trunk and the angle to the tree’s top using a tool called Biltmore stick or an electronic instrument called a hypsometer. In the activity, learners use a ruler and simple ratio method to estimate a tree’s height.
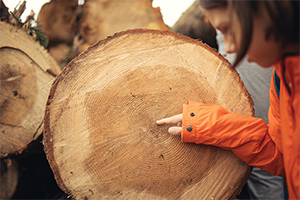
To determine the tree’s width, foresters use diameter at breast height (DBH) as their standard of measurement. Because tree trunks are often wider at their base, foresters always measure the width at a distance of 4.5 feet (1.4 m), or roughly the height of a person’s chest, from the ground (“breast height”). Foresters typically use one of three instruments to measure DBH: (1) a diameter tape or “d-tape”, which shows the diameter of the tree when it is wrapped around the trunk; (2) calipers, placed with arms on either side of the trunk, or (3) a Biltmore stick, which a specially designed ruler. Without these instruments, it is easiest to measure the circumference, as in the activity.
Materials:
Metric ruler (or yardstick) and large ball of string or measuring tape; large sheet of paper and marking pens, or other way to record group measurements.
Get Ready:
Select a tree or trees for learners to measure.
Introduce
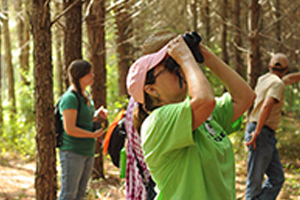
Show learners the tree you have chosen and ask them why a person might want to measure a tree like this. Invite them to think about how they would measure the tree’s trunk circumference (how big around it is) and its height. Have learners share their ideas with a partner.
Experience
- Ask learners to estimate the circumference of the tree’s trunk in inches or centimeters. Then have them measure the circumference using a piece of string and a metric ruler or yardstick, or a tape measure. Have learners record their findings and compare their actual measurement with their estimate.
- Explain that when foresters inventory forest areas, they always measure the width of a tree’s trunk at a distance approximately chest height, or 4.5 feet (1.4 m), above the ground. To see why this is an important measurement standard, have learners measure the circumference of the tree at 1 foot (.3 m), 2 feet (.6 m), and 4.5 feet (1.4 m) above the ground to compare their measurements (trees are usually wider toward the base). Ask learners what would happen if everyone measured the circumference of a tree at a different height. Introduce the term diameter at breast height (DBH) and ask learners how they could calculate the tree’s DBH (they may use the formula: diameter = circumference/π (remembering that π=3.14).
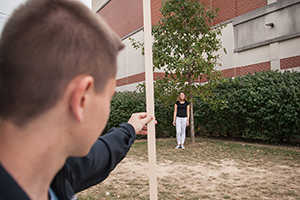
- Ask learners to estimate the height of their tree. Then, invite them to determine its height using their ideas or the following method, which involves ratio:
- Have Person 1 stand at the base of the tree and Person 2 a distance from the tree. Person 2 should hold a ruler at arm’s length and walk backward, keeping their arm stiff, until the top and bottom of the ruler line up with the top and bottom of the tree.
- Note where the top of Person 1’s head appears on the ruler (for example, at 2 in or 5 cm).
- Divide the length of the ruler by the number from step b.
- Multiply Person 1’s actual height by the number from step c.
Connect
Invite learners to use a Scribner Table to estimate the board feet of timber their tree contains. First, based on the height, they should calculate how many 16-foot logs they could cut from the tree. Then, using the tree’s DBH and the Tree Scale chart, determine the board-feet. Encourage them to compare that amount of wood to the 12,000-20,000 board feet needed to build an average U.S. home. How many trees would it take to build an average home?
Point out that foresters use tree measurement data to suggest options for using forest resources in the most cost-effective and environmentally friendly way. Ask students for ideas of who else might use tree measurement data, like height and diameter and circumference.
TAKE ACTION!
Suggest that learners use a tree identification guide to determine what species their tree is and to find out how big it may grow. Do they anticipate any problems with the tree growing that tall or wide? Will there be enough room for this tree to get that large?